
Ironing a shirt, pants or bed linen correctly is more complicated than simply running a hot iron over the fabric. The result is affected by the temperature, the humidity of the material, the direction of movements and even the sequence of processing individual parts. For example, a cotton shirt can remain wrinkled due to insufficient steam, and shiny marks often appear on dark pants after ironing. Delicate synthetic fabrics are even more sensitive: excessive heat can permanently damage the fibers.
The main rule of good ironing is to first check the label, select the recommended temperature, and start with the most delicate fabrics. Cotton and linen are usually easier to iron with steam, while synthetics, silk, and wool need to be treated with more care.
For shirts, the correct sequence is important: collar, cuffs, sleeves, shoulder and main panels. It is more convenient to iron bed linen in separate sections, gradually moving the fabric along the board.
Let's look at how to choose the temperature, properly iron different types of clothing, and avoid common mistakes that quickly cause things to wrinkle again.
Where to start ironing: five basic rules
Before turning on the iron, you need to sort the clothes by material and check the manufacturer's recommendations.
This is especially important for items made from mixed fabrics, with decorative elements, lining or special coating.
1. Check the label
The markings on the label determine the maximum permissible ironing mode.
Even if a shirt is made mostly of cotton, it may contain elastane or other fibers that are sensitive to high temperatures.
2. Start with a low temperature
The iron heats up faster than it cools down.
Therefore, it is more practical to iron synthetics and delicate materials first, then move on to fabrics that can tolerate higher temperatures.
3. Don't iron dirty clothes
Before ironing, make sure there are no stains on the items.
Under the influence of heat, some contaminants can become more firmly fixed in the fibers, making further washing difficult.
4. Use a sturdy ironing board
The surface must be flat, sufficiently dense and suitable for working with steam.
An unstable board makes ironing difficult and creates a risk of burns.
5. Let things cool down
After ironing, the fabric remains warm for some time and may contain residual moisture.
If you fold it tightly right away, new creases may appear.
It is best to hang shirts, jackets, and pants on appropriate hangers first.
What do the dots on the iron icon mean?
The international textile labeling system uses an iron symbol with one, two or three dots.
The number of dots indicates the permissible level of heating of the sole.
According to the current GINETEX system and the ISO 3758:2023 standard, the following temperature limits are used.
| Mark | Maximum soleplate temperature | Features |
| One dot | 120 °C | Low temperature ironing |
| Two dots | 160 °C | Moderate heating |
| Three dots | 210 °C | High-temperature ironing |
| Crossed out iron | Ironing is prohibited. | Risk of product damage |
| Iron with no-steam symbol | Low temperature without steam | Steam can damage the material |
On older labels and instructions, you may also find temperature limits of 110, 150, and 200 °C, which were used in previous versions of the standards.
It is important to follow the labeling of a specific product.
The number of dots indicates the maximum allowable temperature, not the required ironing temperature. If the item irons well at a lower temperature, there is no need to increase it.
Ironing temperature for different fabrics
The choice of temperature depends on the composition of the fabric, its treatment and the recommendations of the clothing manufacturer.
For example, regular cotton fabric can often withstand high heat, but a cotton product with a thermal print may require much more delicate care.
| Material | Approximate mode | How to iron |
| Cotton | Often three dots | With steam, slightly moisten if necessary |
| Linen | Often three dots | Iron slightly damp. |
| Polyester | Usually low or moderate | Inside out, no overheating |
| Viscose | Low or moderate | Carefully, without pulling too hard |
| Silk | Mostly low | From the inside out, through a protective fabric if necessary |
| Wool | Often moderate | Through a damp cloth, without strong pressure |
| Nylon, acrylic | Mostly low | Short contact with the sole |
| Fabrics with elastane | By the most sensitive fiber | Avoid high temperatures |
The table helps you navigate, but does not replace labels.
Mixed fabrics require special attention: the mode must be selected taking into account the most sensitive component.
How to iron a shirt correctly: step-by-step instructions
A shirt consists of several parts of different shapes. If you iron them haphazardly, the already smoothed areas may become wrinkled again.
It is most convenient to work from small parts to large ones.
This approach is also used in shirt care recommendations from clothing manufacturers and experts at the University of Arkansas.
Step 1. Prepare the shirt
Make sure the product is clean and all buttons are undone.
A cotton shirt is often easier to iron when slightly damp.
If it is completely dry, you can gently moisten the fabric with a spray bottle, if the label allows it.
No need to get the shirt wet.
Excess moisture increases the ironing time and can leave stains on sensitive materials.
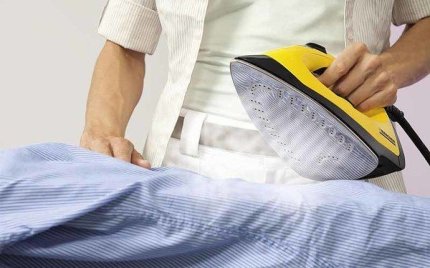
Step 2. Smooth the collar
Unbutton the collar and lay it out on the board.
Work the wrong side first, moving from the ends to the middle.
This helps reduce the risk of wrinkles around the edges.
Then turn the collar over and carefully iron the outside.
Do not hold the sole in one place, especially if there is an adhesive pad inside.
Step 3. Iron the cuffs
Unbutton the buttons and lay the cuffs flat.
First, treat the inside, then the outside.
For double cuffs, the design and desired bend shape must be considered.
Do not run the hot sole directly over the buttons.
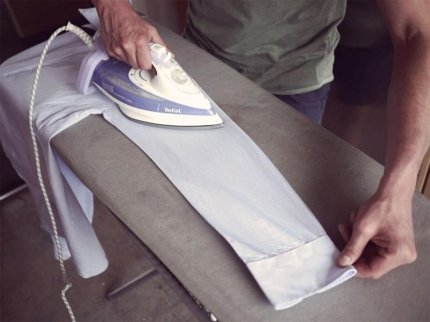
Step 4. Smooth out the sleeves
Place the sleeve on the board, aligning the seams and straightening the fabric.
Carefully iron one side, then the other.
If you don't want to get a clear arrow on the sleeve, don't press the iron to the very top fold.
For a neat result, a special narrow board for sleeves is convenient.
Step 5. Work the shoulder part
The shoulder yoke is conveniently placed on the rounded end of the ironing board.
Smooth out small areas by gradually moving the shirt.
Try not to create new folds near the seams.
Step 6. Iron the front and back
Place one front of the shirt on the board and gradually smooth out the fabric.
It is convenient to iron the button placket from the inside out so as not to damage the hardware.
After that, move on to the back and the second front piece.
If the shirt has a pocket, gently straighten its edges.
Step 7. Hang the shirt on a hanger
Hang the shirt on a hanger immediately after ironing.
If necessary, fasten the top button to help the collar retain its shape.
Allow the fabric to cool and dry before putting the item away in the closet.
How to iron a shirt so that there are no wrinkles
The most common problem is repeated compaction of already treated areas.
This happens if the fabric is moved across the board without straightening it before each movement.
It is more practical to work in small areas.
Before ironing, make sure there are no creases under the top layer.
Do you need to press hard on the iron?
No.
For most fabrics, temperature, humidity, and even contact with the sole are crucial.
Excessive pressure can create shiny marks and seam impressions.
If a cotton shirt is not smoothing well, it is better to check the temperature and the admissibility of using steam, rather than simply pressing harder.
How to properly iron flared pants
Pants need special attention, as an incorrectly formed dart can significantly ruin their appearance.
The first thing you need to do is check the fabric composition.
For wool suit pants, moderate temperatures and protective fabric are often used.
Step-by-step ironing of classic trousers
Check the label and set the appropriate temperature.
If necessary, turn the pockets inside out and gently smooth them out.
Iron the belt and top.
Lay out one leg, aligning the inner and outer seams.
Align the lines of future arrows.
Treat the fabric with short strokes through a suitable protective cloth.
Repeat for the second leg.
Hang the pants and let them cool.
How to make arrows even
The most important thing is to align the seams of the pants correctly.
If the fabric is twisted, you can accidentally create an additional arrow next to the main one.
For woolen pants, it's better to use the pressing technique: lift and reposition the iron, rather than constantly moving it back and forth.
There is no need to form darts on pants whose design does not provide for them.
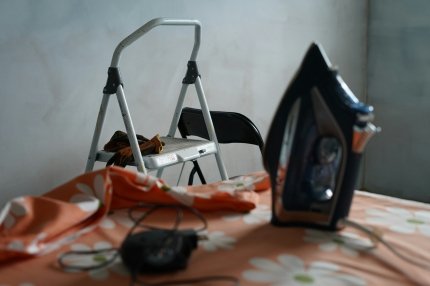
How to iron jeans
Denim is often made from cotton, but modern models may contain elastane and other synthetic fibers.
Therefore, you should not automatically select the maximum temperature.
If ironing is allowed, it is convenient to turn the jeans inside out.
First, treat the pockets, waistband, and areas near the seams.
After that, gradually smooth out the trousers.
For dark denim, it is especially important to avoid excessive pressure, which can leave shiny marks.
Jeans with scuffs, decorative patches, or special coatings require extra care.
How to iron bed linen correctly
Bed linen usually has a large surface area, which makes ironing more time-consuming.
The main task is to evenly spread the fabric and not create new creases while moving it.
Care instructions depend on the material: cotton calico, satin, linen, microfiber, and blended fabrics may require different temperatures.
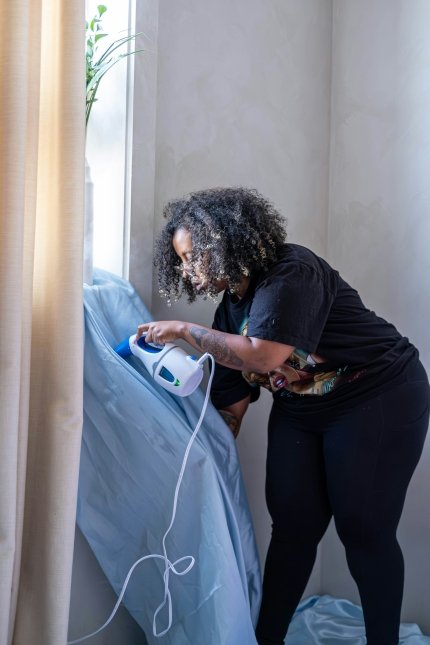
How to iron a sheet
First, spread the sheet out and align its edges.
If the fabric is large, you can fold it into two layers, but keep in mind that the bottom layer may warm up unevenly.
For a thorough result, it is better to iron accessible areas sequentially, checking both sides.
Gradually move the fabric across the board, not letting it touch the floor.
If the material is cotton or linen, light moistening and allowed steam can make smoothing easier.
How to iron a fitted sheet
Such sheets are more difficult to straighten due to the tight corners.
It is most convenient to process the central part first.
Then, pull the individual corners onto the rounded edge of the ironing board and smooth out the adjacent areas.
There is no need to stretch the elastic band too much or press it directly with a hot iron.
High temperatures can damage elastic components.
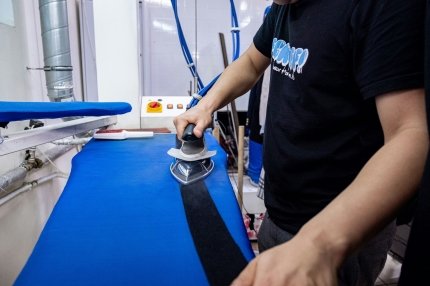
How to iron a duvet cover
First, spread out the duvet cover, align the edges, and check for any twisted fabric inside.
For convenience, you can fold it in half.
However, one should not expect that a single steam treatment will guarantee smoothing out all the layers.
The most wrinkled areas should be ironed separately.
Pay special attention to seams, corners, and the fastener area.
How to iron pillowcases
It is convenient to iron pillowcases inside out, especially if they have decorative trim.
First smooth the seams and corners, then the main part.
Buttons, zippers and decorative elements should not be pressed directly with the hot soleplate.

Is it necessary to iron bed linen after each wash?
No, this is not a universal requirement.
For everyday bedding, proper washing, complete drying, and clean storage are important.
Ironing can improve the appearance, smooth the fabric, and make it more pleasant to the touch.
However, it should not be considered a guaranteed disinfection.
The temperature inside the folded layers may be lower than the sole temperature, and the contact time may be uneven.
If textiles require special sanitization, an appropriate washing and drying regimen must be followed.
How to iron linen to remove strong creases
Linen fabrics wrinkle easily due to the peculiarities of the fiber structure.
At the same time, many natural linen products tolerate high temperatures well, if permitted by the labeling.
How to iron a linen shirt or dress
It is most convenient to iron linen when it is still slightly damp.
If the fabric is dry, you can gently moisten it and allow the water to distribute evenly.
Use steam if permitted.
Iron in small sections, smoothing the material before each stroke.
Dark linen should be handled with particular care: strong pressure can create an unwanted shine.
For protection, you can use a suitable thin fabric.
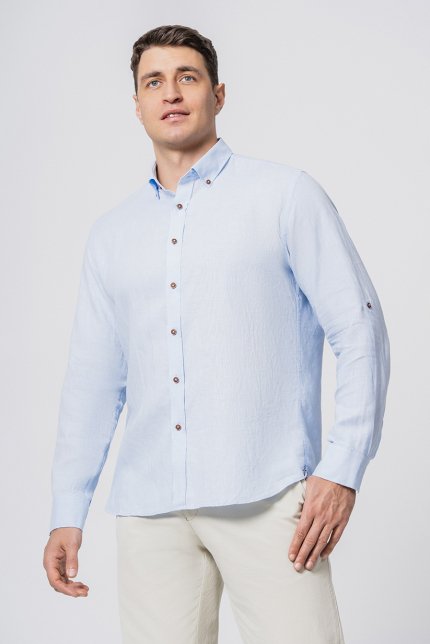
Why does linen wrinkle even after ironing?
This is a natural property of the material.
After sitting, bending the arms, or other mechanical stress, the folds may reappear.
Therefore, you should not try to completely eliminate the natural texture of linen by excessive heating.
How to properly iron silk and satin
Silk requires delicate care.
High temperatures, excessive humidity and strong pressure can damage the surface or leave unwanted marks.
Before ironing, you must check the label.
How to iron natural silk
If ironing is allowed, select a low temperature.
Work from the wrong side and use a thin protective fabric if necessary.
Determine the humidification and steam mode by referring to the label: some silk products may be sensitive to water stains.
Don't hold the sole in one place.
Can satin be ironed?
Satin is a type of thread weave, not the name of a specific fiber.
It can be silk, polyester, or made of other materials.
Therefore, the temperature must be determined by the composition of the product.
It is especially important not to overheat synthetic satin, as its surface may deform or lose its characteristic shine.
How to iron woolen items so they don't shine
Woolen pants, skirts, and jackets sometimes only need spot smoothing.
Strong pressure and constant friction with a hot sole are undesirable for them.
Wool ironing technique
Check the allowed temperature.
Turn the item inside out if possible.
To protect the surface, use a suitable slightly damp cloth.
Apply the iron in short strokes without stretching the product.
After processing, allow the material to cool.
For some wool items, vertical steaming may be more convenient if permitted by the manufacturer.
Particularly complex designs, such as jackets with molded shoulders, are not always advisable to iron with a regular iron.
How to properly iron polyester, viscose and other synthetics
Synthetic fabrics can be sensitive to high temperatures.
It is especially important for them not to focus only on appearance.
For example, polyester sometimes resembles cotton or silk, but requires a different treatment.
Polyester
Usually use low or moderate temperature according to the label.
It is better to iron dark clothes inside out.
Do not hold the hot sole in one place.
If the fabric already has irreversible traces of melting, regular ironing will not restore it to its original state.
Viscose
Viscose can be particularly sensitive to mechanical stress when wet.
There is no need to pull the fabric too hard while ironing.
Choose a delicate setting and use a protective cloth if necessary.
If the label prohibits ironing, you should not experiment even at the lowest temperature.
Clothing with elastane
Elastane is added to jeans, pants, dresses, and sportswear to provide stretch.
High temperature can deteriorate the elastic properties of such materials.
Therefore, for blended fabrics with elastane, you need to focus on the manufacturer's limitations, not just the main fiber.
How to iron skirts, dresses and pleated items
For complex products, it is important not only to smooth the fabric, but also to preserve the design.
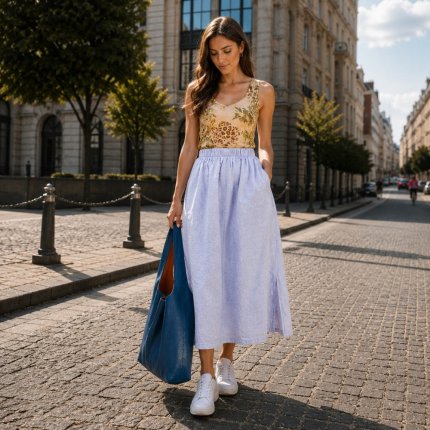
For example, a pleated skirt has pre-formed pleats.
The wrong direction of ironing can change their shape.
Pleated skirt
First, check the material and whether it can be ironed.
Gradually straighten each fold to its original shape.
Use a protective cloth and short presses if necessary.
There is no need to stretch the pleated fabric across the board.
Some types of synthetic pleated have heat-formed pleats that can be damaged by repeated heating.
Dress with decorative details
Lace, sequins, beads, thermal prints and decorative appliqués can be sensitive to temperature.
Such areas should not be directly pressed with a hot sole.
If the design is complex, it is sometimes safer to treat only accessible fabric parts or use permitted vertical steaming.
How to use steam correctly when ironing
Steam helps to relax the fibers and makes it easier to remove wrinkles.
It can be especially useful for cotton and linen.
However, not all fabrics can be steamed.
GINETEX provides a separate designation for ironing without steam, as for some materials, wet steam can cause irreversible changes.
Why does water sometimes leak from the iron?
The cause may be insufficient soleplate temperature, excessive use of steam boost or limescale buildup.
Rowenta recommends using steam only at the appropriate temperature setting and not pressing the powerful steam button continuously.
For some steam generators, the ability to supply steam at low temperatures is provided by design, but this is not a universal rule for regular irons.
What kind of water to pour into the iron
Recommendations depend on the model.
Philips allows tap water for many steam irons, but recommends distilled or demineralized water or a suitable mixture for hard water.
You cannot add vinegar, perfumes, essential oils or descaling agents to the tank yourself without the manufacturer's permission.
Such additives can damage the appliance and leave stains on clothes.
Iron or steamer: which is better for different things
These devices perform similar, but not identical, tasks.
A regular iron ensures direct contact of the hot soleplate with the fabric.
The steamer works mainly with steam and allows you to process items in a vertical position.
| Task | Which is usually more convenient? |
| Clear shirt collar | Iron |
| Arrows on classic pants | Iron |
| Large cotton sheet | Iron or steam generator |
| Linen shirt with complex pleats | Iron with steam allowed |
| Easy dress refresh | Steamer, if allowed |
| Clothes with a complex cut | Often a steamer |
| Thick cotton fabric | Ironing is usually more effective |
A steamer cannot always replace an iron.
For example, it is more difficult to create clear darts on pants or a perfectly even collar with a regular hand steamer.
At the same time, it may be more convenient for some delicate items if their material allows steam treatment.
How to iron clothes without an ironing board
If there is no special board, you need to provide a stable, flat surface that can withstand heat.
However, not just any table is suitable for this.
Laminate furniture, plastic coverings and some wooden surfaces can be damaged by temperature and moisture.
You can use a special heat-resistant ironing mat according to the manufacturer's instructions.
Do not iron directly on a mattress, sofa or surfaces that may catch fire or deform.
To quickly remove small wrinkles, sometimes hanging clothes properly after washing helps.
However, the result depends on the material and does not always replace full ironing.
How to remove shiny marks after ironing
The shine is most often noticeable on dark pants, woolen items, and some synthetic fabrics.
It can occur due to excessive temperature, high pressure, or a change in the structure of surface fibers.
How to prevent shine
Iron dark items inside out.
Use appropriate protective fabric.
Do not press too hard or hold the iron in one area.
Be especially careful around seams and pockets.
If shine has already developed, sometimes a gentle moistening or permitted steam treatment can improve the appearance of the surface.
However, if the fibers are thermally damaged, it may not be possible to completely remove the mark.
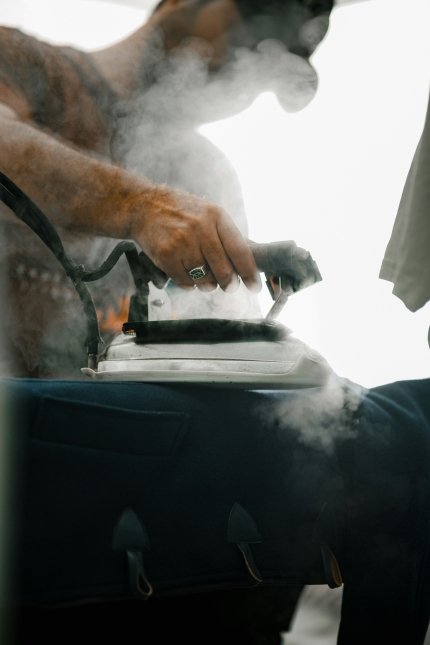
Why do clothes wrinkle again after ironing?
Sometimes the item looks smooth immediately after processing, but within a few minutes new creases appear.
The most common cause is residual moisture or improper cooling.
If you fold a shirt that is still warm, the fabric may fix new folds.
This is what happens when sheets are folded tightly without letting them dry completely.
How to save the result
After ironing, let the items cool down.
Hang shirts and jackets on appropriate hangers.
Fold bed linen only after it is dry.
Don't overcrowd your closet so that clothes are constantly squeezed between other items.
For linen and some natural fabrics, the reappearance of wrinkles during wear is a normal property of the material.
How to iron a lot of things faster
The most effective way to reduce the amount of unnecessary steps is not to reduce the contact time between the iron and the fabric.
For this, it is worth preparing everything in advance.
Practical sequence
Separate items that cannot be ironed.
Group the rest by permissible temperatures.
Start with delicate fabrics.
Prepare a spray bottle if needed.
Place the hangers next to the board.
Iron similar items in sequence.
Finish with cotton and linen if they can tolerate high heat.
There is no need to constantly switch the iron between minimum and maximum temperature.
This approach is time-consuming and increases the risk of accidentally overheating delicate fabric.
The most common mistakes when ironing
Select temperature only by fabric name
The composition and special processing of the product may change the permissible regime.
Iron over stains
High temperatures can make their removal difficult.
Use steam on all fabrics
Some materials require dry ironing.
Pressing too hard on the iron
This can create shiny marks and seam marks.
Iron on buttons and zippers
This can damage the fittings or soleplate of the iron.
To fold things hot
Warm and damp fabric makes it easier for new creases to form.
Leaving the iron unattended
A switched-on appliance poses a risk of burns and fire.
During breaks, the iron must be placed in the safe position provided by the manufacturer. After finishing work, disconnect it from the power supply.
Never use vertical steam on clothing that is already worn by a person. Hot steam can cause serious burns.
Conclusion
High-quality ironing depends primarily on the correct temperature regime and understanding the properties of the fabric.
For shirts, it is best to follow the sequence of processing small parts and main panels. Classic trousers require precise alignment of the arrows, and bed linen is more convenient to iron gradually, without creating new creases.
Cotton and linen often respond well to moisture and steam. Synthetics, silk, wool and decorative fabrics require a more delicate approach.
The most important rule remains the same: the manufacturer's label takes precedence over universal temperature advice.
FAQ: Frequently asked questions about proper ironing
How to iron a shirt correctly so that there are no wrinkles?
First, check the label and select the temperature. Then iron the collar, cuffs, sleeves, shoulders, front panels and back in sequence. After ironing, hang the shirt on a hanger and let it cool.
At what temperature should you iron cotton?
Many cotton products are suitable for high-temperature ironing, which is indicated by three dots. According to the current marking system, this means a maximum soleplate temperature of 210 °C. However, you should follow the label of the specific item.
How to iron bed linen correctly?
Flatten the fabric, align the edges and iron in small sections, gradually moving the garment across the board. For cotton and linen, lightly dampening is usually helpful if permitted by the label.
Do I need to iron bed linen after every wash?
Not necessarily. For regular bed linen, proper washing, complete drying, and clean storage are important. Ironing mostly helps improve the appearance and texture of the fabric.
How to iron pants with darts?
First, smooth out the pockets and the top. Then, fold each leg, matching the seams, and carefully shape the darts. For wool, use a protective cloth and short presses instead of hard rubbing.
How to iron linen so that it doesn't wrinkle?
Linen is often easier to iron slightly damp using permitted steam. However, it is impossible to completely prevent re-creases as this is a natural characteristic of linen fibres.
Can polyester be ironed?
Yes, if the label allows it. Usually use a low or moderate temperature. To reduce the risk of shiny marks, it is often better to iron polyester inside out.
How to remove iron shine from dark pants?
If the shine is caused by superficial pressure on the fibers, a gentle steam treatment with a permitted steam can sometimes help. However, if the material has been thermally damaged, restoration may not be possible. To prevent this, iron through a protective cloth and do not press too hard.
What is better for clothes - an iron or a steamer?
An iron is usually more convenient for sharp darts, collars, and thick cottons. A steamer may be more practical for some delicate items and intricate cuts. The choice depends on the fabric and the manufacturer's recommendations.
How to iron things if there is no information on the label?
First, determine the possible composition of the fabric. Start with a low temperature and test the reaction on an inconspicuous area. If the material is unknown, especially if the item is expensive or delicate, there is no need to risk high heat.

